Topic: DMD0481

The Web Server
(Only available on BRX CPUs)
Ethernet-equipped BRX CPUs have an on-board web server that can be accessed by any web browser (HTTP protocol) by specifying the IP address of the BRX CPU as the URL. The Web Server provides some automatically generated status pages and a REST API that allows remote data access to web clients. The CPU's web service has an HTTP-based REST API which allows read-access to the memory elements in the BRX CPU from any web browser or other web client programming package.
The web server uses the BRX CPU's Server Whitelist to allow only the specified network devices access to the PLC's memory and I/O through the REST API. Note: user accounts must have the HTTP Server privilege to access the on-board web server and / or the REST API.
By default the web server and the REST API are both disabled; they are enabled on the System Configuration -> CPU Configuration dialog.
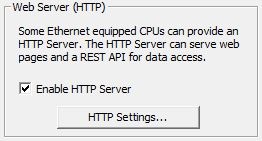
Once the web server is enabled, click the HTTP Settings button to further refine the list of options the web server allows:
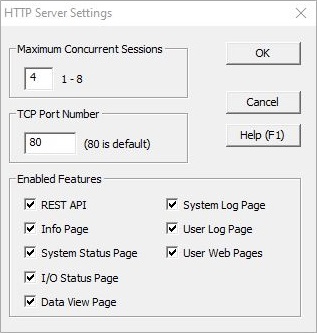
Maximum Concurrent Sessions is the number of HTTP sessions the web server will maintain at any given time. Be aware that each session will consume PLC memory and will add processing time to the PLC scan. Once the session limit is reached, all additional session requests will be denied.
TCP Port Number is the port number the web server will listen on for HTTP requests. 80 is the default for web browsers; changing this number means you will need to specify this same the port number in each HTTP request.
Enabled Features allows you to select which options the web server will present:
Enable REST API to allow a web browser's access to elements in PLC memory, returning that data in JSON formatted records. The web server requires the use of the REST API to build the Info, Status and I/O Monitor pages.
The on-board web server automatically builds several web pages that can be displayed in a web browser. The following selections turn ON / OFF the automatic building of those web pages:
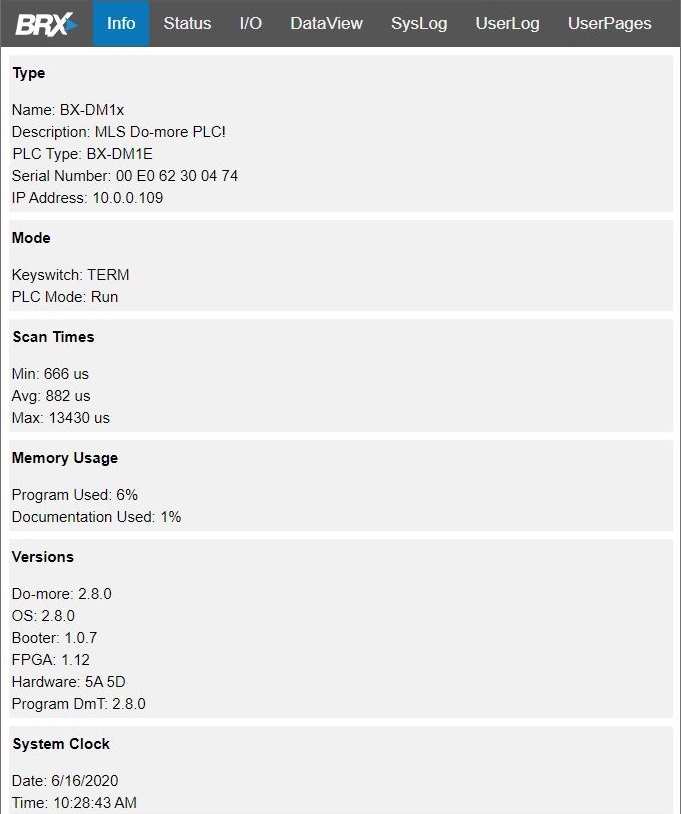
Info page shows the basic information about the PLC: the CPU type, the PLC's current Run / Stop mode, current scan time, current memory usage, hardware and software versions in use, and the current time.
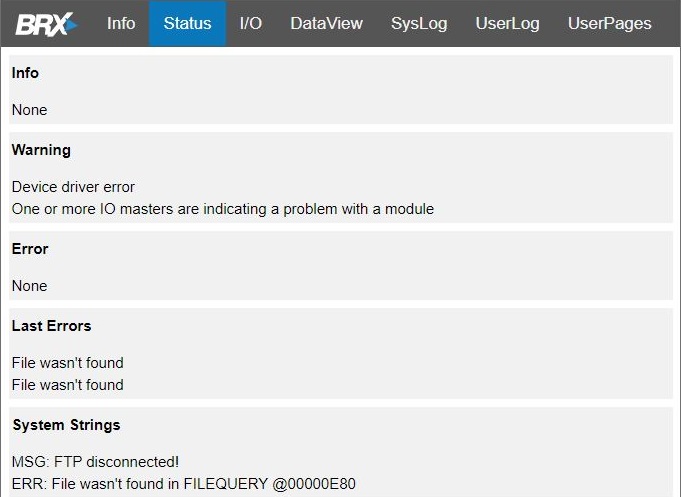
Status page shows the current values of the system status variables; the same information that's in the System Information -> System Status page in Do-more Designer.
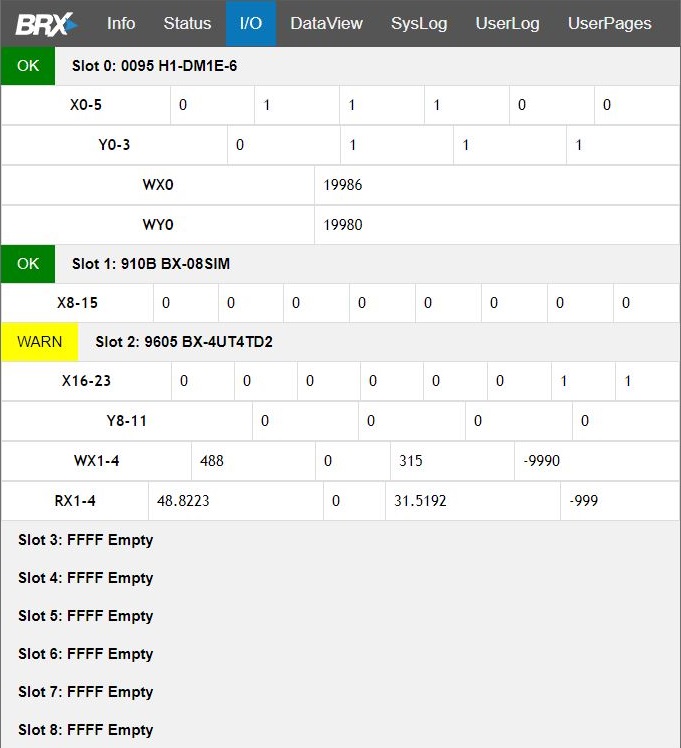
I/O page shows the current values of the discrete and analog I/O in the PLC system. The page automatically updates once per second so you don't need to refresh the page.
System Log page shows the current entries in the System Log.
User Log page shows the current entries in the User Log.
User Web Pages shows a directory listing of any pages in the User Pages folder on the PLC's RAM drive ( @RamFS/UP/... ). Selecting any of those links will display that page.
Note: User HTML pages can also be placed in the PLC's SD Card file system (@SDCardFS) by creating a folder named "/sd" then placing the HTML files in that folder. You cannot browse to files on the SDCard; to open these files you must enter the fully qualified path to the file in a browser, for example, HTTP://10.0.0.109/sd/MyUserFile.html.
User-created HTML pages can be placed in either the @RAMFS or @SDCardFS file systems by using any of the following methods:
The FTPGET (Retrieve File from Remote) instruction to download files from an FTP server.
The Browse PLC File System utility to copy files from a PC running Do-more Designer.
The Copy File (FILECOPY) instruction to move files between the @SDCardFS file system and the @RAMFS file system.
The Enable User HTTPHeaders option allows the user to create their own HTTP header that gets returned as part of any response to client requests. After enabling this option, the process is as follows:
In the Memory Configuration, create a new String Heap Item named HTTPHeaders with a length that is appropriate for the header you need to build ( up to 1022 characters ).
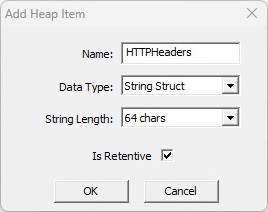
Use Print to String (STRPRINT) to generate the content for the HTTPHeaders string. When a client requests data from the Web Server and the HTTPHeaders string is NOT empty, this user-defined header will be included in the response. Note: it is the sole responsibility of the user to properly format the contents of the header.
An example of a user header is a CORS (Cross-Origin Resource Sharing) header which is used to enable web servers to allow requests from one domain to access resources from another domain.
Access-Control-Allow-Origin: https://example.com
In this example, Access-Control-Allow-Origin is the name of the CORS header, and https://example.com is the value indicating which domain is allowed to access the resources. This header specifies that the resources can be accessed by web pages served from https://example.com. This header tells the browser that it's permitted to make requests to the server from the specified domain.
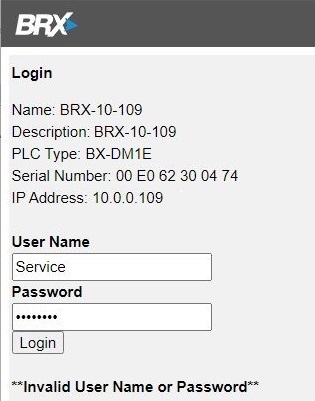
Once the web server has been enabled in the System Configuration, the main web page in a BRX CPU can be opened with any web browser by simply entering the TCP/IP address of the CPU as the URL.

If the CPU has been configured with credentialed user accounts, you will first be prompted to login with an appropriate Username / Password combination. If the login does not succeed because either the Username or Password are wrong, or if the account does not have sufficient privilege (HTTP Server), you will see a result similar to the following:
When logged in with a credentialed user account the Log Out button will appear on the toolbar. Clicking Log Out will close the current session, and return the user to the login screen. Note: if you close the page WITHOUT logging out, the TCP session will automatically be closed after 30 seconds, which will required you to log back in when you return to the page.
Info:
The Info page shows some basic information about the PLC and it's current state:
Status:
The Status page shows the text for any current Info, Warning, and Error messages:
I/O:
The I/O page shows the current values of the local discrete and analog I/O in the PLC system. The page automatically updates once per second so you don't need to refresh the page:
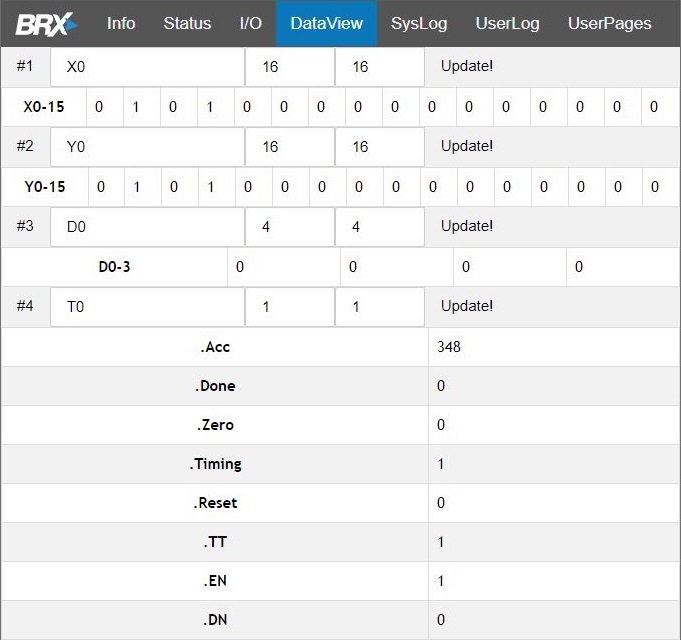
DataView:
The DataView page lets the user display the current status of selected memory locations. The DataView page automatically updates once per second.
There are 4 rows on the page for specifying data points (#1 - #4), the first two are set to X0 and Y0 by default. Each row has these 4 columns: beginning data point, number of consecutive data points, number of columns to display in each row, and the "Update!" hotspot to commit any changes the row's configuration.
To add a data point to a row, click in the first column of a row and enter the element, for a range of successive values, enter the number of elements (up to 128) in the second column. The third column value is the number of columns of display in the row. Click the Update! hotspot in the last column to enter the changes for that row.
Any PLC memory location can be added to a DataView row, even structures or individual structure fields can be displayed. When structures are used, the second column value indicates how many of the structure fields to display: 1 means "most commonly used", 2 means "all fields".
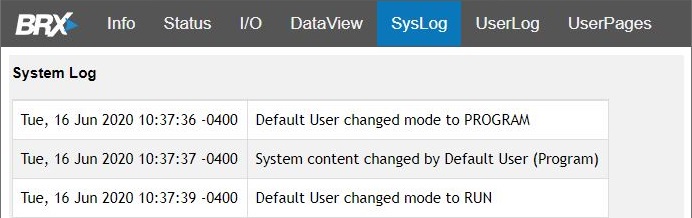
Log Pages:
The System Log page shows the current entries in the System Log:
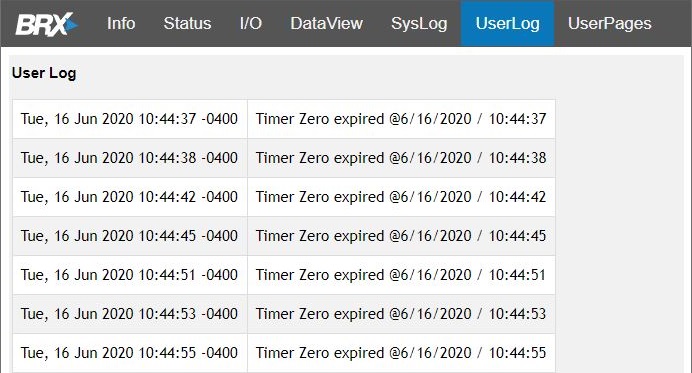
The User Log page shows the current entries in the User Log:
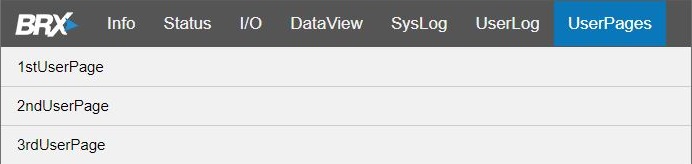
User Pages:
The User Web Pages show a directory listing of any files in the User Pages folder on the PLC's RAM file system ( @RamFS\UP ). Selecting any of those links will display the contents of that file as a web page. Sub-folders are not supported; only files at the root of the UP folder are displayed. There are several ways to get files into the RAM file system:
The Retrieve Retrieve File from Remote (FTPGET) instruction can copy files from an FTP server to the RAM file system.
Do-more Designer has the Browse PLC File System utility which copy files from a PC running Do-more Designer to the PLC's RAM file system.
The PLC can use the File (FILExxx) instructions and the String (STRxxxx) instructions to generate files in the RAM file system at runtime.
The PLC can place files in the PLC's RAM drive by using the Copy File (FILECOPY) instruction to copy files from the SDCard file system to the RAM file system.
The Web Server can also reference HTML files on the micro-SD card file system in the @SDCardFS\sd folder. Note: you cannot browse to the @RAMFS\up folder or the @SDCardFS\sd folder and see a listing of the files contained in those folders; you must reference any file in that folder individually, by its fully qualified pathname, for example: 10.0.0.109\sd\1stUserPage.html.
See Also:
The BRX CPU's On-board Web Server
The BRX CPU's HTTP-based REST API
Related Topics:
FTPGET - Retrieve File from Remote
HTTPCMD - HTTP Request / Response with Server
MQTTPUB - IoT Publish MQTT Topics
MQTTSUB - IoT Subscribe to MQTT Topics