Topic: DMD0292

Trend Overview
The Trend View tab is used to collect the values of Do-more controller data elements over time then display them on a moving graph. The Trend View can collect and display the value of any readable numeric location, any readable bit location, or any constant value. The Trend View can provide a snapshot of all of the controller elements in the Trend at a specific time by clicking with the mouse at the desired time location on the Trend.
The Trend View also provides a Historical Mode which lets the programmer view all of the data that has been collected for each of the data points on the display. These logged data values can also be exported to a CSV file for importing into a third-party application for further research, or exported to a Trend Archive that can be opened in a different instance of Do-more Designer.
Creating a new Trend View
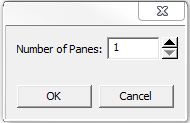
A new (empty) Trend View can be created by selecting Debug-> Trend View -> New from the Online Toolbar to create a new Trend View, or clicking the Trend button on the Online toolbar. The following dialog is displayed prompting for the number of Panes to initially create:
A Trend View can also be created and prefilled with the critical elements
from the selected instructions using the following methods:
-
Right-click on any instruction in a ladder diagram and select Trend Instruction - the one exception is the Closed Loop Controller (PID) instruction which will open the PID View.
-
Highlight a range of ladder logic instructions, then select Debug-> Monitor Values-> from Rung Contact/Coils to Trend View
-
Highlight a range of entries in a Data View, then right-click and select Trend Selection
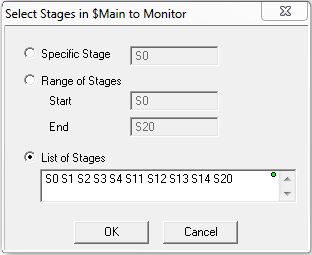
Note: a special case exists when trending Stage (SG) instructions. This dialog will be displayed giving the programmer the option to trend one of the following:
Saving and Opening an Existing Trend View
Once a Trend View has been created, and its display options have been set, the Trend View configuration can be saved to a file using the Debug-> Trend View-> Save As menu option. A saved Trend View can be reopened using the Debug-> Trend View-> Open to invoke a dialog to select a previously saved Trend. Once the Trend View is opened it will begin logging the current data values for the controller elements in the Trend.
Note: the Save and Save As options only retain the Trend View configuration, they DO NOT retain the data values were collected while the Trend was running. To save the currently collected data values AND the Trend View configuration use the Export Range option which will create a Trend Archive as described below.
Using Export Range to Save As a Trend Archive file (TRARC) file.
A Trend Archive will contain the Trend View configuration, all of the data collected for all of the elements on all of the Panes in that Trend View, and any other project components that are required to reconstruct and display the Trend View in another Do-more Designer project. The contents of this file can be imported into a separate instance of Do-more Designer by using the File-> Import-> Trend Archive Into New Project...to create a new offline Do-more Designer project, then reconstruct the Trend View, and import all of the exported data into that Trend View
See Also:
Trend Overview
Related Topics: