Topic: DMD0462

Select PLC Connection
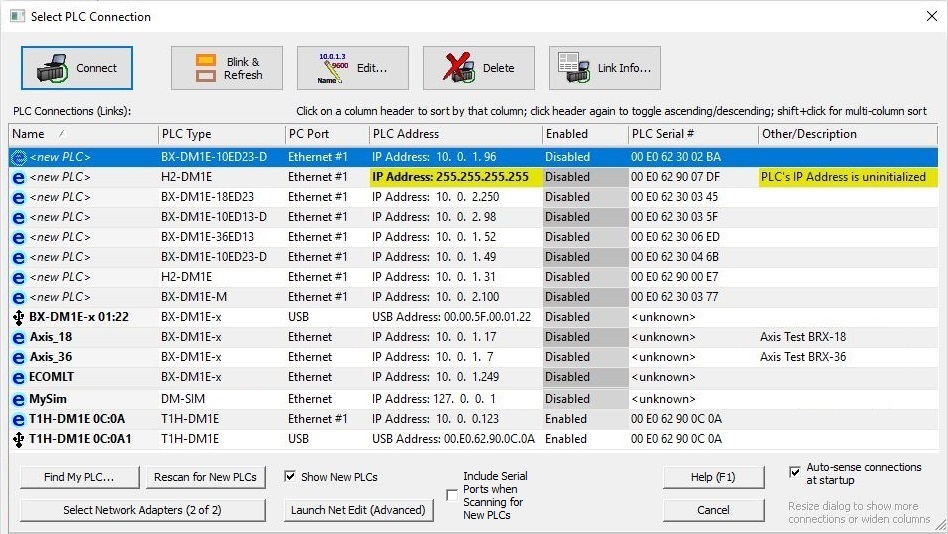
The Select PLC Connection dialog provides the tools that are necessary to create connections to new PLCs over the Ethernet, serial and USB ports on the PC running Do-more Designer, and the to manage those connections later as needed. The buttons along the top are operations that can be performed on the connection that is currently highlighted in the center section. The center section is a list of the currently defined connections and any PC that can be detected that are not yet used in a connection. The selections along the bottom are used to help locate PLCs that should be in the center list but are currently not there.
When this utility is first opened, it will scan all of the network adapters, serial ports and USB ports for PLCs that are currently accessible. If the PLC is used in an existing connection it's current state will be shown in the PLC Connections table. If a PLC is not currently used in a connection, it will be marked as a <new PLC> in the table.
Clicking the Connect button will cause Do-more Designer to attempt to connect with the currently highlighted PLC from the list. Depending on the current state of the PLC there could be one of several things happen:
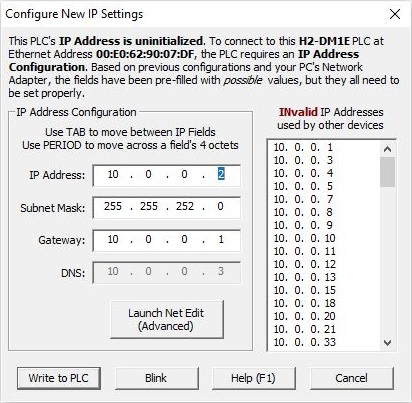
If the PLC's IP Address has not been configured the Configure New IP Settings dialog will be displayed. Before an Ethernet connection can be made, the PLC's Ethernet port must have its IP Address information configured with values that allow it to operate on the same network and the PC attempting to connect to it. To that end, when a PLC is selected that does not have its IP Address configuration setup the Configure New IP Settings dialog will be displayed.
When this dialog is first opened, it will examine the Ethernet settings of the NIC where the PLC was found and prefill the Subnet Mask, Gateway, and DNS fields with the same values as the NIC where it was found. It will then search for an unused IP Address on the same network as the NIC and prefill that field with a unique address. It will also generate a list of the IP Addresses on that network that are already in use by another device.
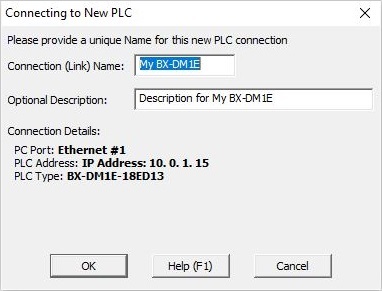
If the PLC's IP Address has been configured but the PLC is not already used in a connection the Connecting to New PLC dialog will be displayed. Each connection must have a unique name, and each can have an optional description.
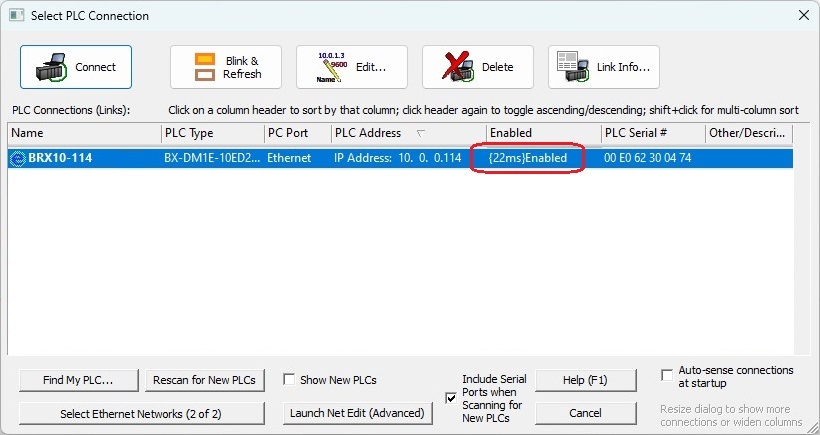
Blink and Refresh cause the selected PLC to blink its ERR led yellow (not the traditional red for an error condition) for 15 seconds. This is useful for visually confirming that the connection you have selected from the list is the actual PLC you think it is. Enabling the Do Not Ask Again option will bypass this confirmation dialog in the future. It will also reread the information that was read from the PLC when the Select PLC Connection dialog was first launched.
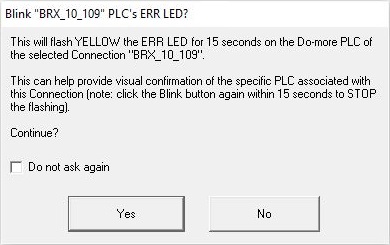
If successful, the ERR LED on the selected CPU will blink yellow for 15 seconds. The turn-around time for the Blink request will be displayed in the Enabled column as shown in the graphic below. This value is useful in determining an appropriate timeout value for the link; a good starting point would be 2x the turn-around time shown here.
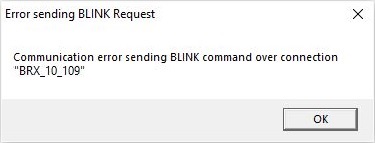
If the attempt to get the PLC to blink the ERR led is NOT successful you will see a message similar to the following and the Enabled state will be set to "Bad Comm".
Clicking the Edit button will open the highlighted connection in the Configure Link dialog where the communication parameters of the link used in the connection can be changed.

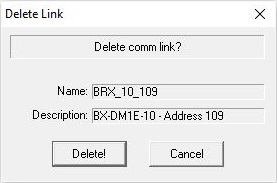
Clicking the Delete button will remove the highlighted connection from the list.
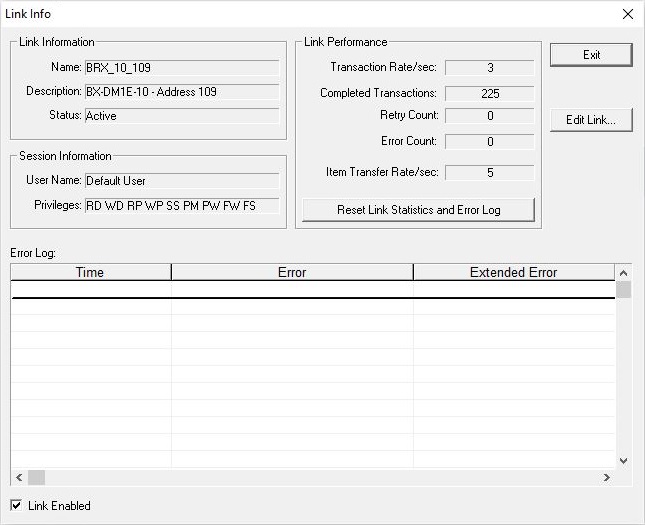
Clicking Link Info will open the Link Info dialog for the highlighted connection where the operational statistics of the connection can be seen, and any errors that have occurred while that connection has been in use are logged.
The PLC Connections list in the center of the dialog contains entries for all of the existing connections, and entries for any Do-more compatible devices that can be found on all of the Ethernet networks the PC is connected to. The list can be sorted by any column in the table; click on the column header to sort by that column.

The Name column will have the either the Connection Name for existing connections, or <new PLC> for PLCs that have detected on the Ethernet, Serial, and USB ports of the PC, but are not used in an existing connection.
The PLC Type column will contain the Full PLC Part Number if communication to this PLC was successful, or the base model number stored in the connection if PLC is offline.
The PC Port column shows which port on the PC the connection is using, either Ethernet #1, Ethernet #2, etc. (if the PLC is online), Ethernet(if the PLC is offline), COM1, COM2, etc. (if serial), or USB.
The PLC Address column contains the address of the PLC that is used in the connection:
If the PC Port is Ethernet then the address is the user-assigned IP Address of the PLC. Note: if the IP Address is the factory-assigned 255.255.255.255.255, this means the PLC's IP Address is uninitialized. The IP Address configuration will have to be assigned by the user before this PLC can be used in a connection.
If the PC Port is USB the address is the factory-assigned address of the USB port of the CPU.
If the PC Port is a Serial port the address is simply the name of the serial port, e.g. COM1.
The Enabled column shows the state of the connection:
Enabled means the PLC used in the connection is online.
Disabled means the PLC used in the connection is offline.
Bad Comm means an attempt to contact the PLC using the current settings in the connection failed.
The PLC Serial Number column shows the factory-configured serial number of the CPU:
A 12 digit MAC address is shown if the connection is through an Ethernet port on the CPU, through an Ethernet POM (BX-P-ECOMLT ), or through an ECOM100 module (H2-ECOM100).
A 12 digit serial number is shown if the connection is through a USB port on the CPU, or a USB POM (BX-P-USB-B).
<unknown > means the serial number couldn't be read using the current settings in the connection.
The Other / Description column shows the description field from the link that's used by the connection and any additional information about the connection status.
The selections along the bottom are used to help locate PLCs that should be in the center list but are currently not there.

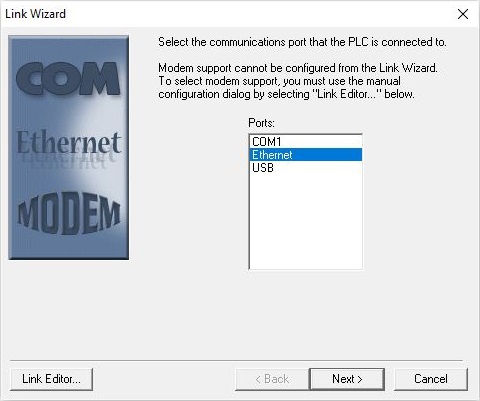
Clicking the Find My PLC... button will open the initial dialog of the Link Wizard which will step you through the process of manually locating a new PLC on the Ethernet port, the serial port, or the USB port and creating a link for that PLC that can be used in a new connection.
Clicking the Rescan For New PLCs button will rerun the network scan that was run when you initially ran the Select PLC Connection utility.
If the Include Serial Ports when Scanning for New PLCs option is disabled, any serial ports on the PC will NOT be scanned for PLCs when the Connect dialog initially scans for PLCs or when the Rescan operation is performed.
If the Show New PLCs option is enabled, PLCs that are not used in an existing connection will be shown in the table as <new PLCs>. If this option is disabled, only PLCs that are already used in a connection will be shown.
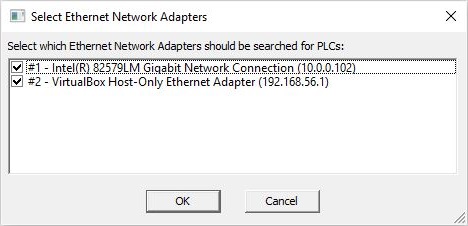
Clicking the Select Network Adapters button will open a dialog where all of the network adapters (NICs) in the PC will be listed. By default, the Select PLC Connection dialog will search for accessible PLCs on all of the NICs in the PC. You can disable any (or all) of the network adapters in the list which will prevent them from being used in future network operations.
Clicking the Launch NetEdit (Advanced) button will open NetEdit as a separate utility.
Having the Auto-sense Connections at Startup option enabled will cause this utility to step through each of the existing connections in an attempt to communicate with the PLC defined in the connection. Doing this work when the utility is first opened is what fills in the information about the PLC's state in the table. Stepping through all of the existing connection does take some time, so disabling this option will make the utility start up faster, but at the expense of having up-to-date state information for the connections.
Note: If this option gets disabled, Minimal Link Info option on the Select Project's main dialog will be enabled, as it performs this same function, just at a different time in the connecting process.
See Also:
Select PLC Connection